...
| Info |
|---|
From xda-developers: How to Install ADB on Windows, macOS, and LinuxReferred to below, ADB is also known as the "Android debug bridge". It is used by android developers or android enthusiasts to perform tasks related to the Android ecosystem such as development, installing custom ROM, and Fastboot. |
Step | Screenshot |
|---|---|
Locate ZT Root CertificateCopy the root.cer file, located in the ZebraTester’s RunTime Data folder (macOS) or the ZebraTester main folder (Windows). | macOS 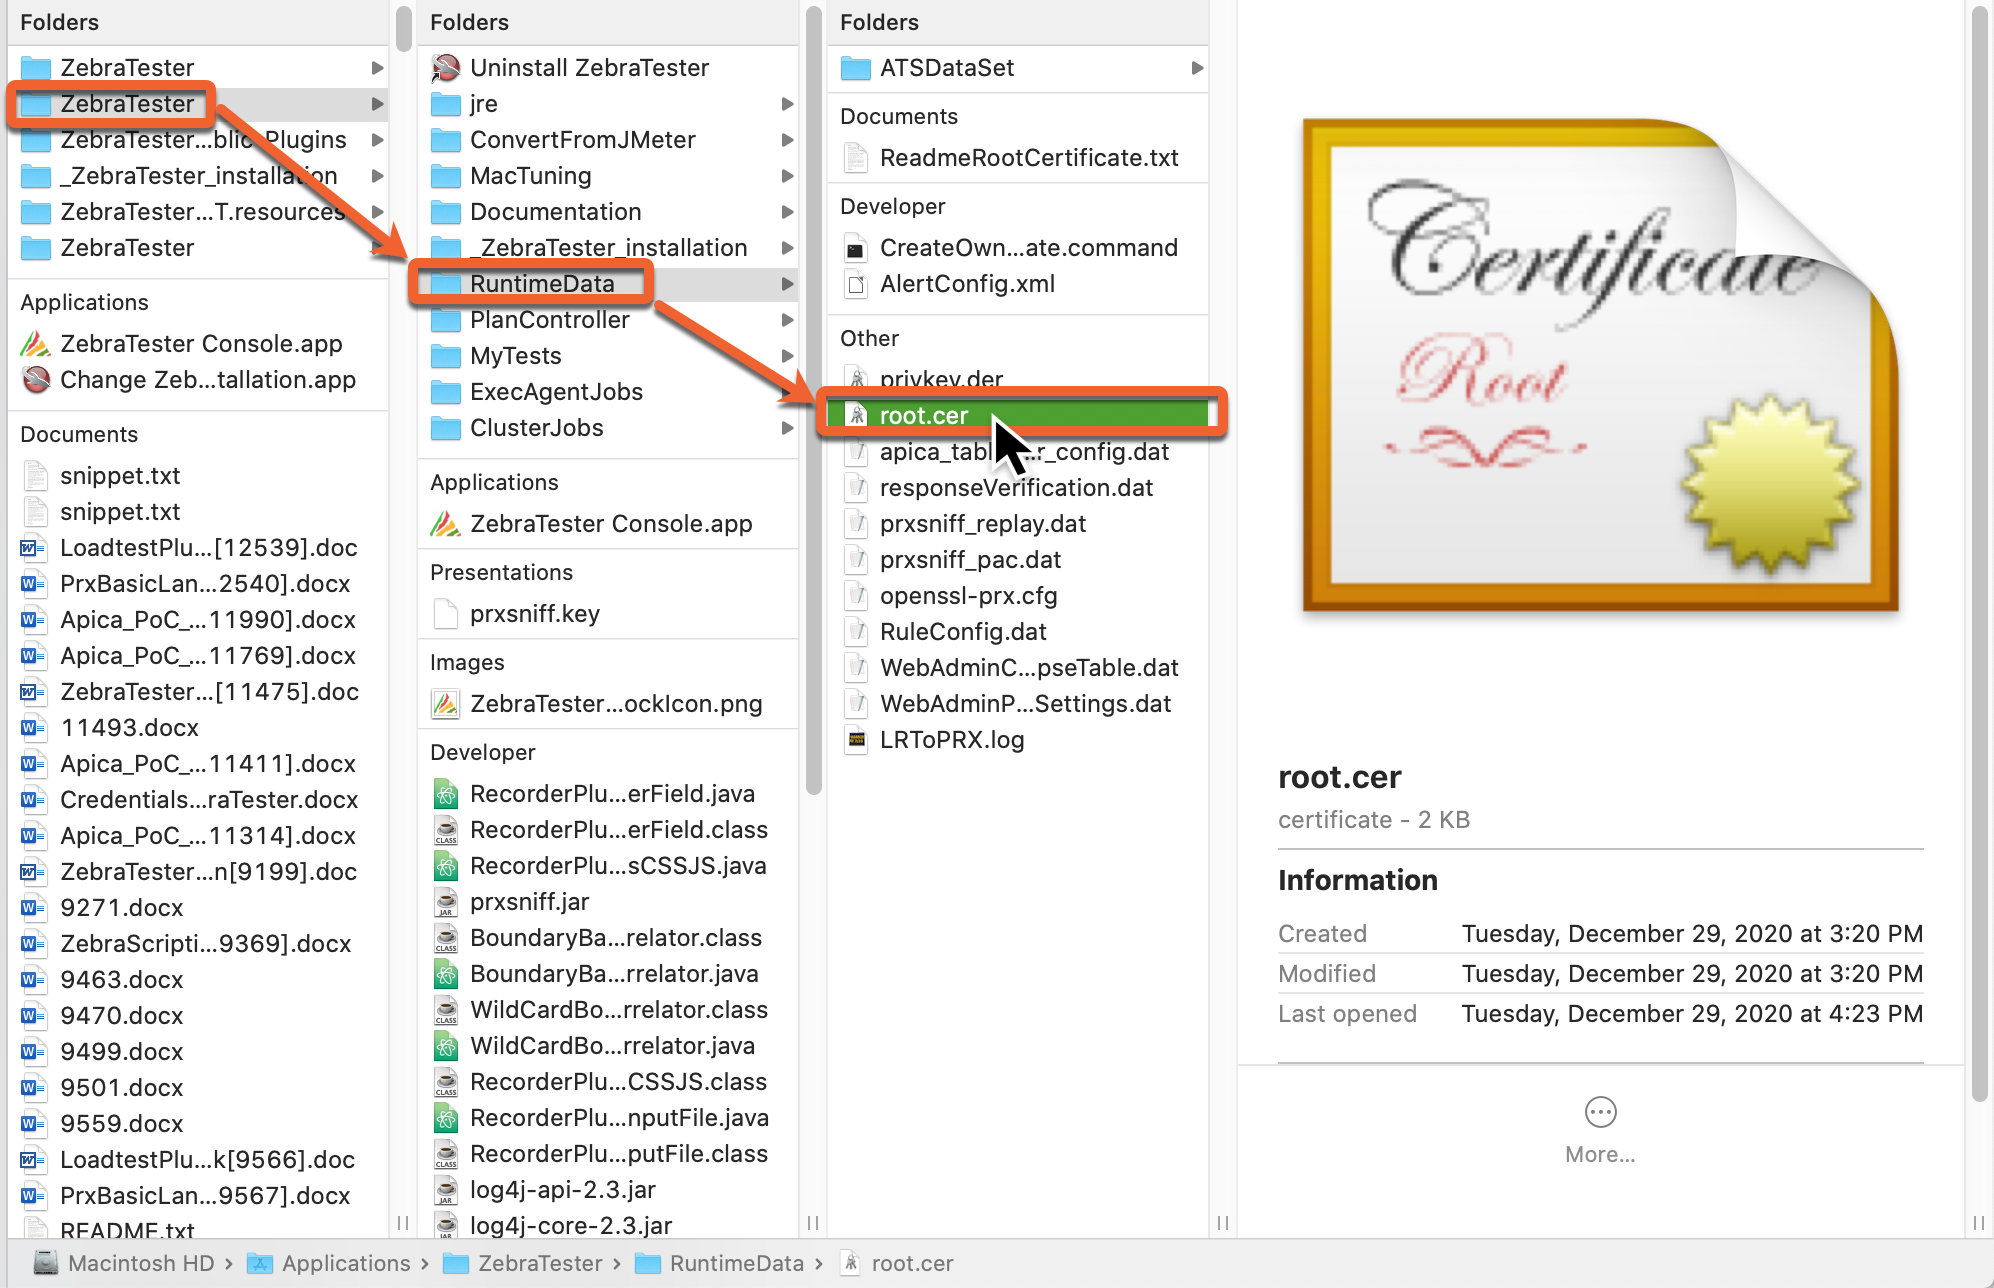 Windows 10 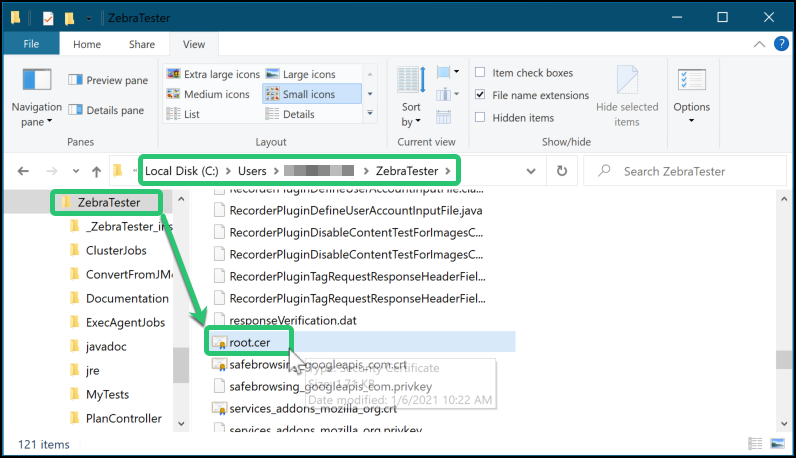 |
Create a New Folder
|  |
Convert root.cer to PEM Format
Example: |  In your new folder you will see the new PEM formatted file after running the command. |
Extract original hashWe need to get the hash value from the original root certificate. Execute the following command that extracts this value to a new line. If you are using Linux or Mac, execute the following command:
==> hashvalue Example: ==> If you are using Windows, execute the following command:
==> hashvalue Example: ==> |  |
Temporarily rename the PEM fileSend the output of the PEM to the named file [hash value+extension of Zero '0'] with this concatinating command.
Example: If you are using Windows, run the above command in Powershell instead of a normal command prompt. | 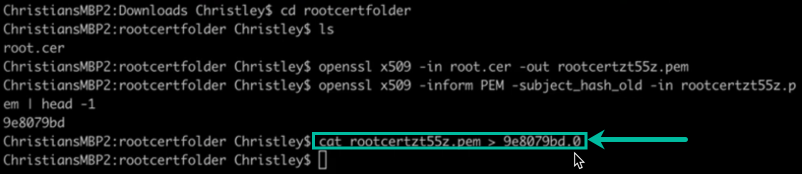 |
Append the output of Information of the PEM file to contents of the just-named file aboveIf you are using Linux or Mac, execute the following command:
|
Example:
|
If you are using Windows, execute the following command:
Example:
|  You should see the original hashvalue.0 file increase in size when you add the output of the PEM file. |
Memu Player Steps (Memu is a Windows Application ONLY) | |
Do the following steps in Memu in Windows 10Enable Root Mode
| 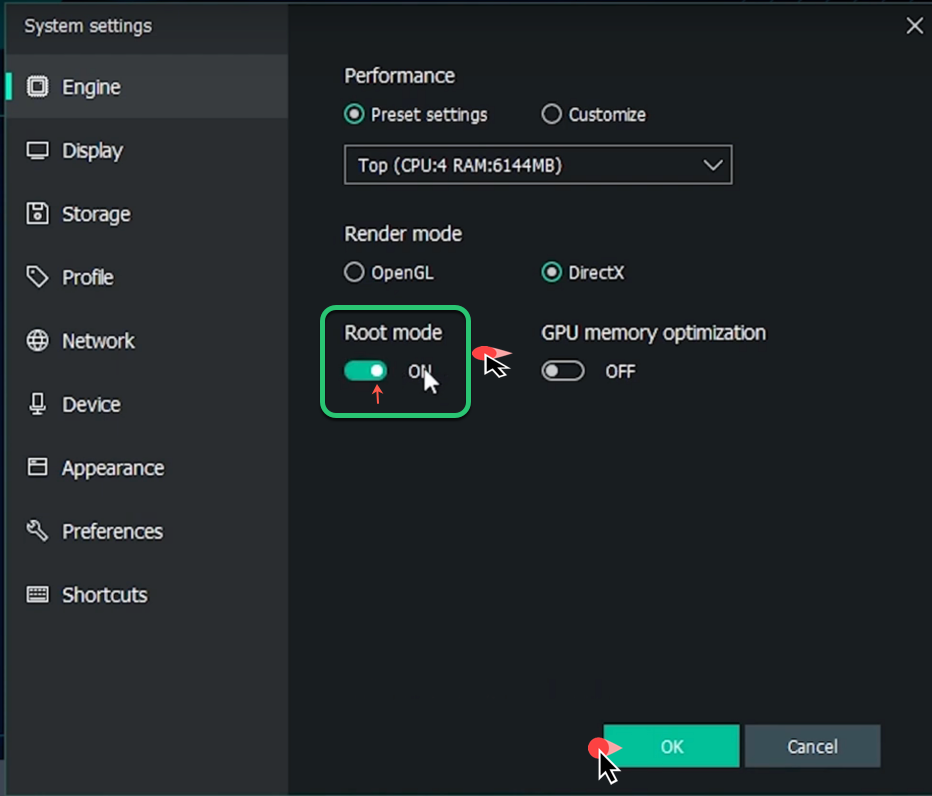 |
Set Developer ModeAfter restarting, you need to use Android’s Developer Mode to be able to use the Root Certificate that you created earlier. From Android (Tablet or Phone) Settings, scroll to the About Tablet/Phone and click in. Then scroll to the very bottom to Build Number and click that section 7 or 8 times until you see that you are now a developer. | 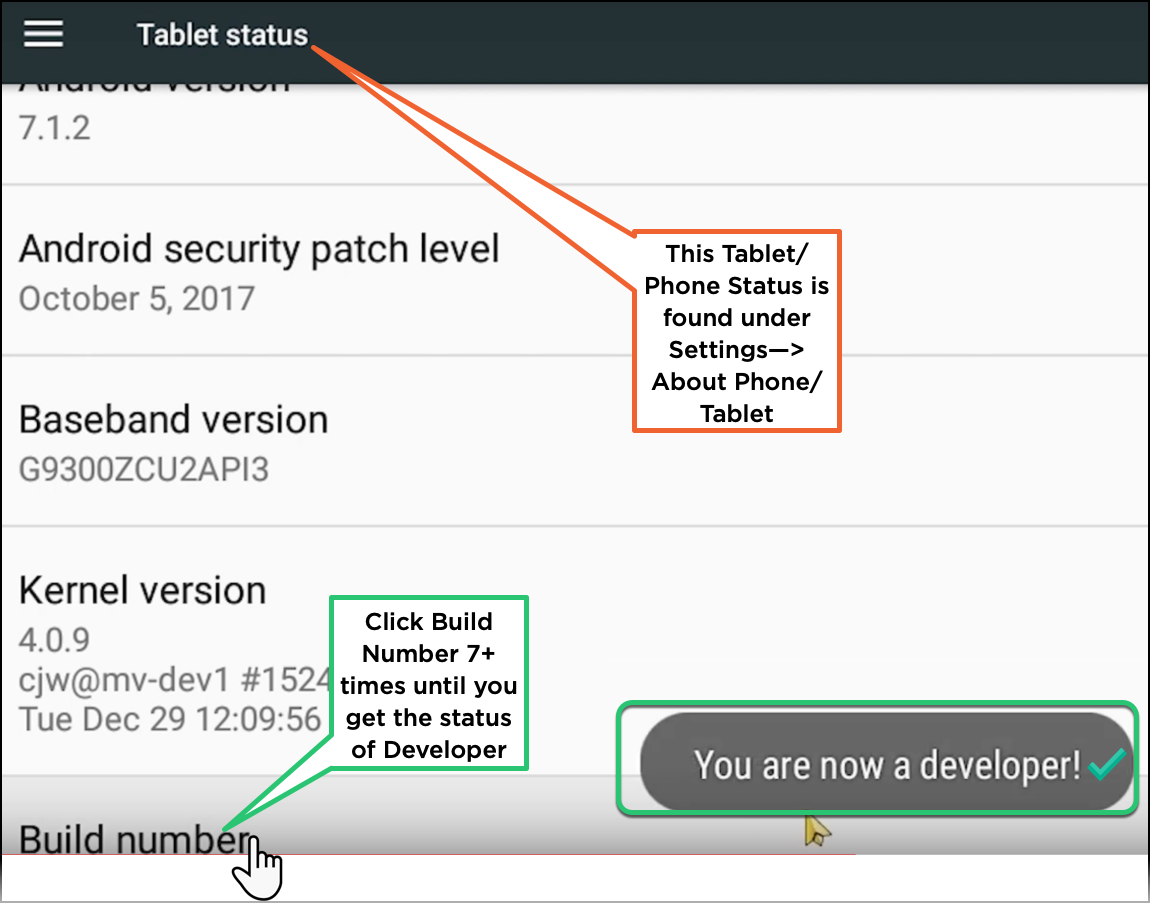 |
Enable USB DebuggingUnder Settings, now that you are a developer, there will be a {} Developer Options that will include a USB debugging Mode
| 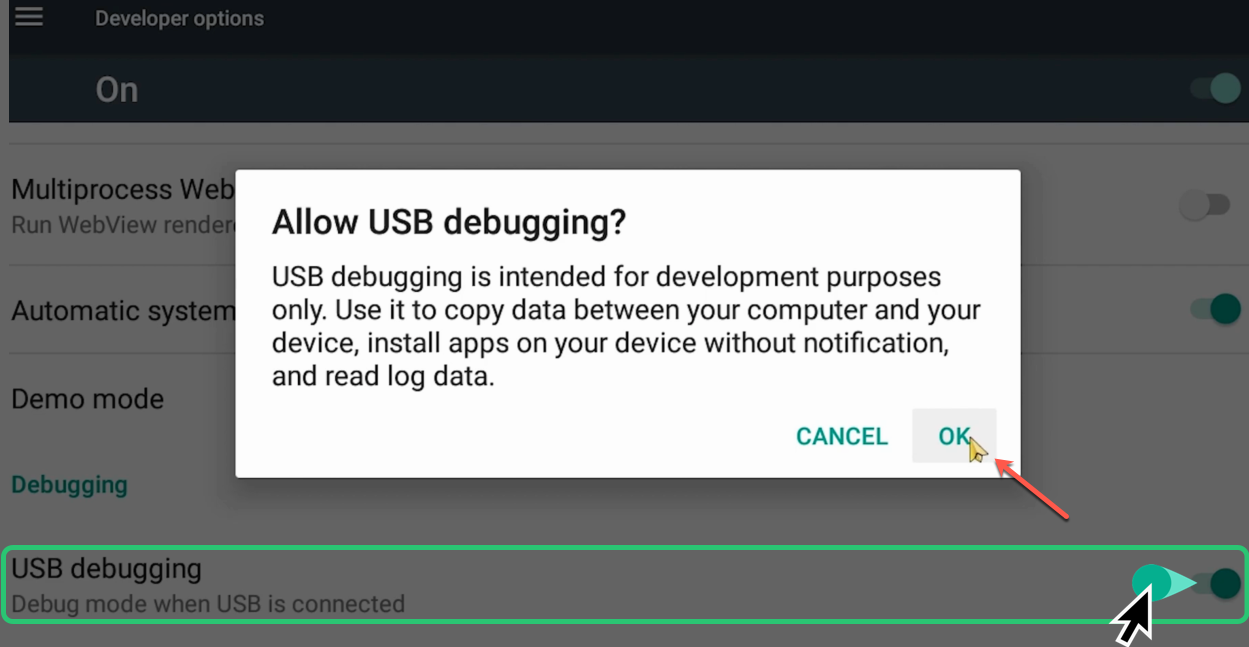 |
Import the Certificate File to the Android System
|  |
Connect ADB Server to the Memu PlayerTo start the server running at port 21503, enter:
Proper response:
|  |
Push the new certificate into the Android System via ADBEnter
Example
|  If you get the message:
this is because ADB is not running as root so do an ADP REMOUNT:
And you should get And then re-enter that command
If this is run correctly, you will see how fast the push went: |
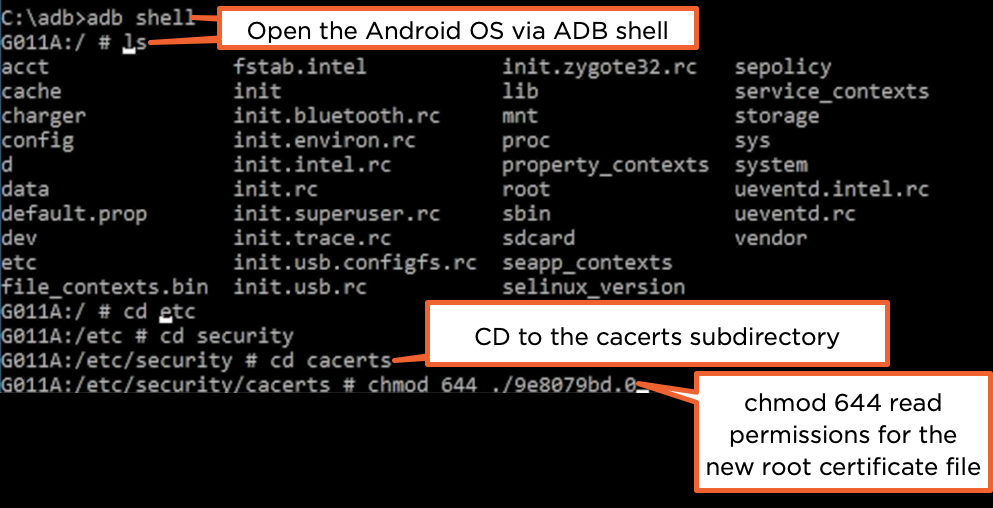
Change Read Permissions of the new Root Certificate File for the Android systemUsing the shell feature of ADB, change to the cacerts subdirectory to change the Root Certificate file permissions to read.
Change directory /etc/security/cacerts Example
|  |
Verify Trusted Credentials in the Android System In the Memu PlayerFollow Android Settings → Security → Trusted Credentials. Scroll down to find the Apica Certificate. | 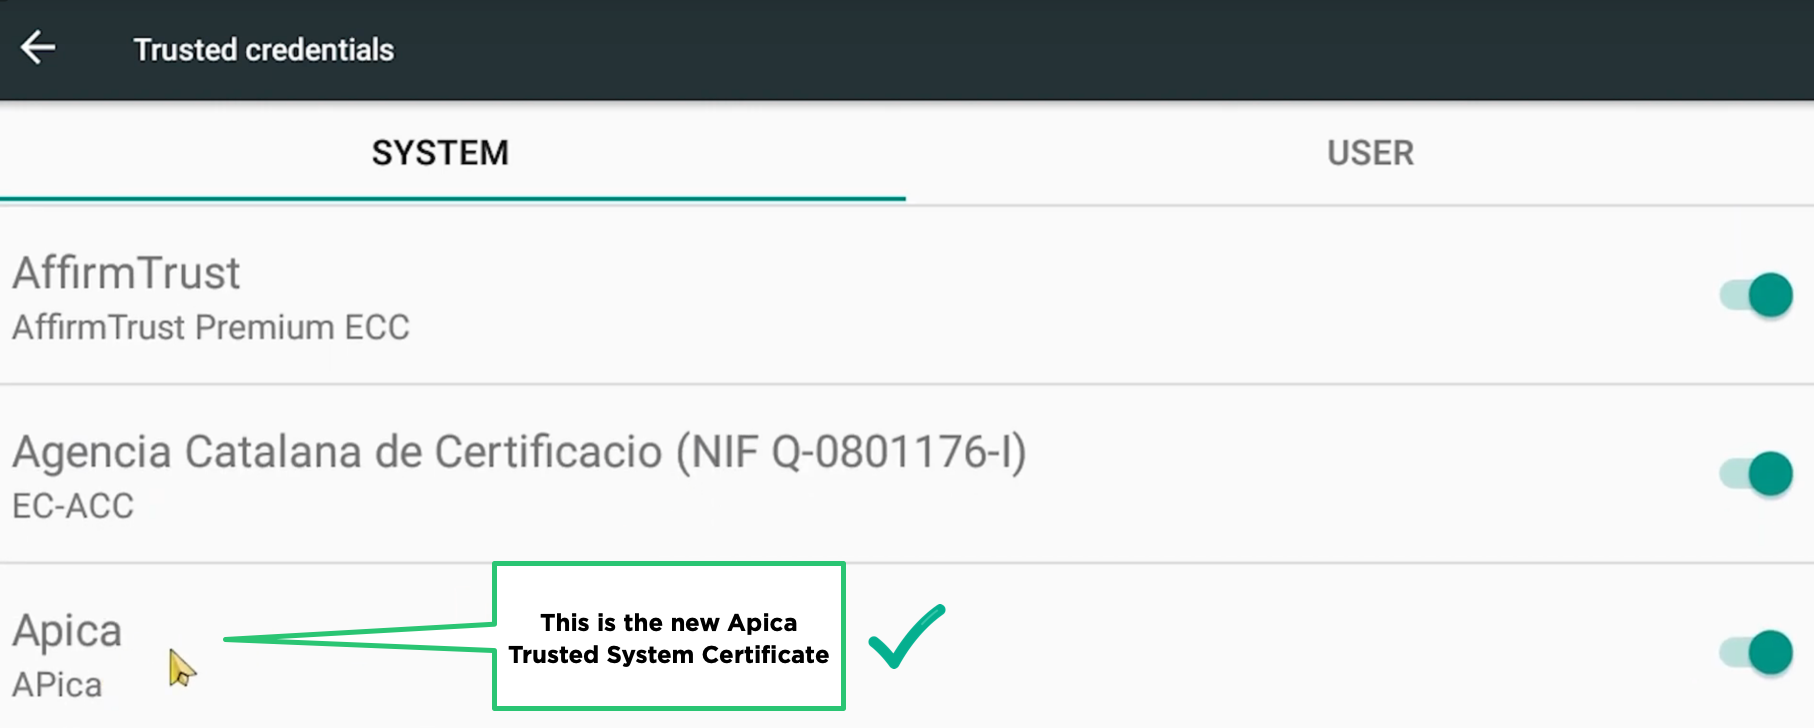 |